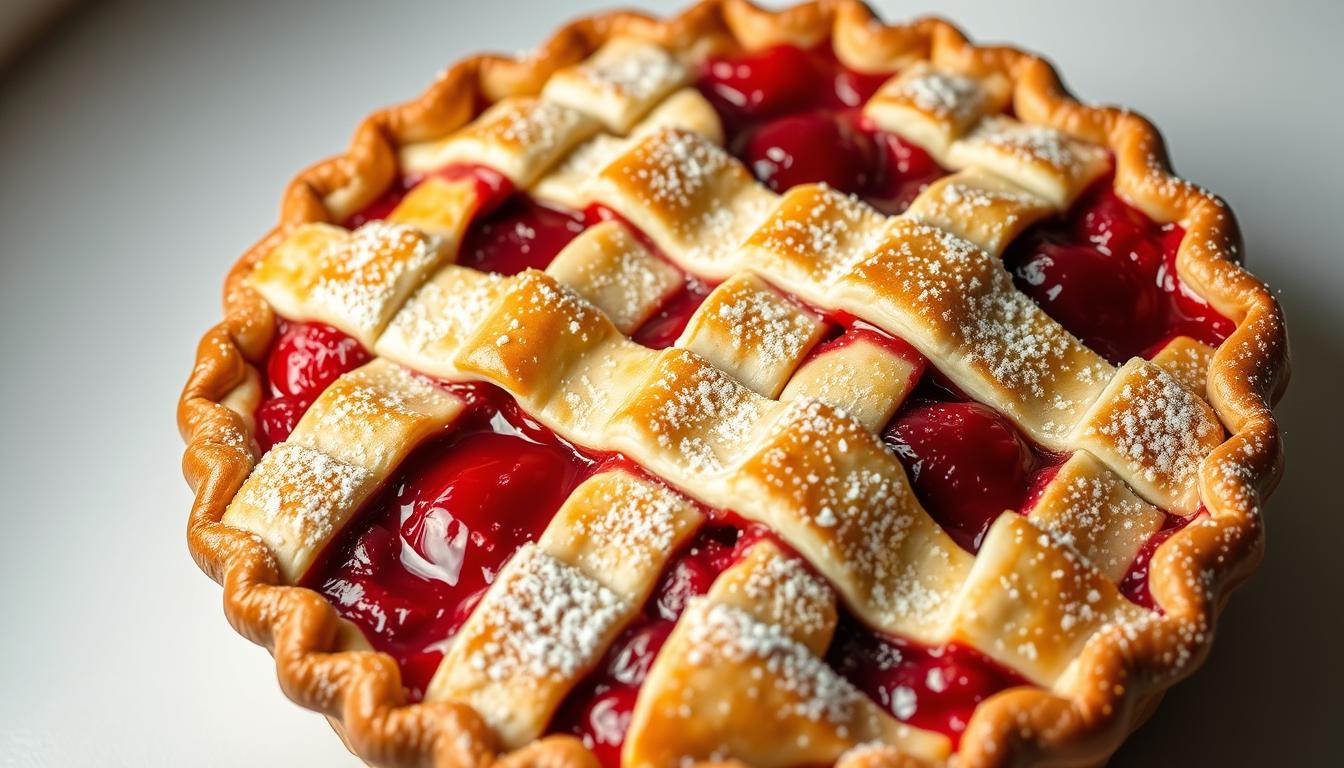
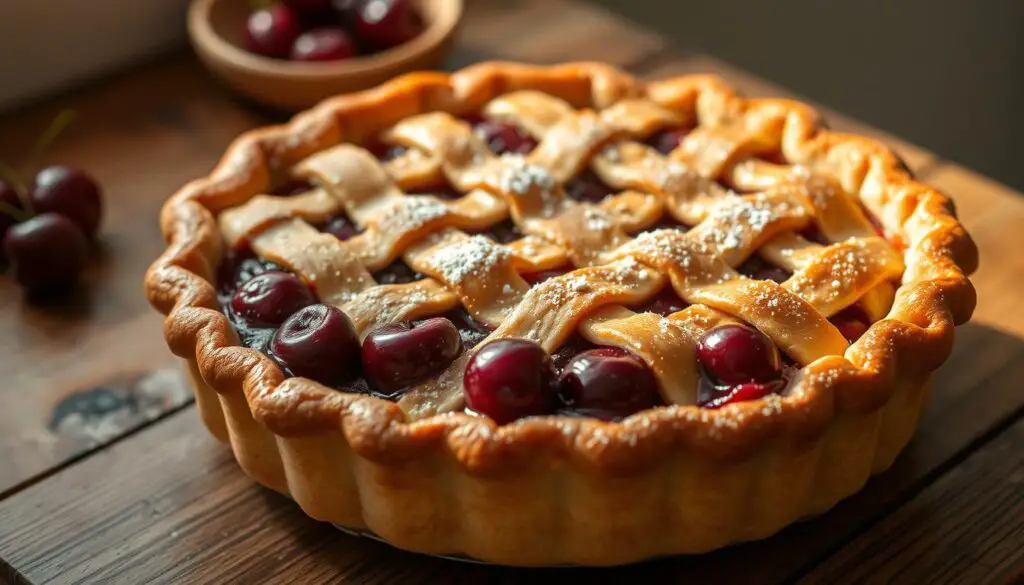
There’s something magical about pulling a golden-brown dessert from the oven, its lattice crust glistening with a hint of sugar. Maybe it reminds you of summers spent picking fruit with family or the cozy satisfaction of sharing something made by hand. Whatever your story, today we’re making memories—and flaky, buttery perfection.
This beloved recipe has been a labor of love since 2017, refined through countless batches and happy taste-testers. The secret? Balancing juicy, quartered cherries with a splash of lemon juice and a touch of almond essence. Fresh fruit gives the filling its vibrant flavor, while gently reducing the juices ensures every slice holds together beautifully.
Don’t worry if you’re new to baking—we’ve got you! From rolling out the dough (hint: cold butter is your friend) to brushing that glossy egg wash, each step is designed for success. And yes, letting it cool fully might test your patience, but trust us: it’s worth the wait for those clean, Instagram-worthy slices.
Key Takeaways
- Fresh cherries create a brighter, more flavorful filling compared to frozen alternatives.
- A splash of almond extract deepens the filling’s complexity without overpowering it.
- Letting the baked dessert cool completely ensures the juices set properly.
- Chilling the dough before rolling prevents shrinking during baking.
- A video tutorial is included to guide you through lattice-weaving techniques.
- Simple swaps, like using store-bought crust, keep this recipe flexible and stress-free.
The Allure of Homemade Cherry Pie
Imagine the scent of baked fruit and buttery crust wafting through your kitchen, a timeless aroma that feels like home. This isn’t just dessert—it’s a celebration of connection, where sticky fingers and shared stories become as cherished as the first bite. For generations, families have gathered around this sweet-tart masterpiece, turning summer harvests into edible heirlooms.
Why Fresh Cherries Make a Difference
Plump, just-picked fruit transforms your pie filling from good to unforgettable. Unlike frozen alternatives, fresh cherries burst with natural juices that mingle perfectly with lemon and almond extract. Rainier varieties add honeyed sweetness, while dark types bring depth—like a flavor symphony in every forkful.
Flavor, Texture, and Tradition
That glossy, ruby-red filling? It’s all about balance. Simmering the juices thickens them into a lush glaze without relying too much on cornstarch. As Shirlee, who’s made this recipe every summer since 2019, says: “It’s the only one where the filling tastes like real fruit—not just sugar.”
| Characteristic | Fresh Cherries | Frozen Cherries |
|---|---|---|
| Flavor Intensity | Bright & Complex | Muted |
| Texture After Baking | Firm, Juicy | Softer |
| Juice Content | Controlled Release | Excess Liquid |
Whether you fold a lattice crust or try a braided edge, each step honors tradition while making it your own. And hey—if store-bought dough lets you focus on the filling? We’ll never judge. After all, joy tastes best when shared.
How to Make the Best Cherry Pie
The journey to a perfect dessert begins in the produce aisle, where selecting vibrant fruit sets the stage for a filling that sings with flavor. Let’s talk about turning those ruby-red gems into a masterpiece that balances sweetness, texture, and heartwarming tradition.
Selecting the Right Cherries and Ingredients
Rainier cherries bring honeyed notes, while dark varieties add depth—combine them for a symphony in every bite. Always choose firm, plump fruit; their natural juices create that “wow” factor without excess liquid. Quarter them (don’t halve!) to ensure each forkful has a juicy burst.
Your crust matters just as much. Cold butter creates flaky layers, while a pinch of sugar in the homemade pie crust adds subtle sweetness. Pro tip: If using store-bought dough, let it warm slightly before rolling—it’ll behave better!
Perfecting the Balance of Sweetness and Tartness
Taste your cherries raw first. Sweeter fruit? Reduce sugar by 2 tablespoons. Tart? Add a squeeze of lemon juice. Cornstarch thickens the filling without dulling the fruit’s brightness—aim for 3 tablespoons mixed with a splash of almond extract.
Mix everything gently in a bowl, then let it sit 10 minutes. You’ll see the magic: sugar draws out juices that’ll bubble into a glossy glaze. As baker Marissa Cole advises: “Your filling should taste like summer—bold, bright, and unapologetically fruity.”
| Cherry Type | Sugar Adjustment | Lemon Juice |
|---|---|---|
| Rainier | -2 tbsp | 1 tsp |
| Dark Sweet | No change | 2 tsp |
| Sour | +¼ cup | 1 tbsp |
Preheat your oven to 375°F while assembling—the right temperature ensures a golden crust without soggy bottoms. Now take a deep breath. That aroma of butter and fruit? That’s pride in the making.
Perfecting Your Pie Crust
Think of your crust as the golden hug around that jewel-toned filling—it should be tender, flaky, and just sturdy enough to hold summer’s sweetness. Whether you’re crafting a buttery masterpiece or opting for a time-saving shortcut, the right techniques turn dough into magic.
Homemade vs. All-Butter Crusts
Traditional recipes often blend butter and shortening—the former for flavor, the latter for flakiness. But an all-butter version? It’s richer, with layers that shatter delicately. As pastry chef Lena Rivera notes: “Butter crusts taste like a warm embrace, while hybrid doughs offer foolproof structure.”
| Type | Flavor | Texture | Ease |
|---|---|---|---|
| All-Butter | Rich, Nutty | Flaky & Crisp | Moderate |
| Butter/Shortening Blend | Neutral | Tender | Beginner-Friendly |
Dough Secrets for Success
Keep everything cold—your butter, water, even the bowl. Work quickly to prevent warmth from melting fat pockets, which create those dreamy layers. Chill the dough for at least 2 hours; this relaxes gluten and prevents shrinkage.
When rolling, start from the center and rotate often. Aim for a 12-inch circle—thick enough to support filling but thin enough to crisp. For double-crust recipes, lightly moisten the edges before sealing to lock in juices.
Remember: dough isn’t fussy. Fold scraps into cinnamon twists or sprinkle with sugar for bakers’ treats. Every crumb tells a story!
Cherry Pie Filling: Ingredients and Technique
The heart of every great dessert lies in its filling—a glistening blend where sweet meets tart in perfect harmony. Let’s craft that jewel-toned centerpiece that holds its shape yet melts on the tongue.
Key Components: Cherries, Sugar, and Lemon Juice
Start with 4½ cups of pitted fresh cherries—their plump flesh bursting with natural juices. Granulated sugar (¾ cup) enhances their sweetness, while 1 tablespoon of lemon juice adds a bright counterpoint. Cornstarch (3 tablespoons) acts as the silent hero, binding everything into a sliceable embrace.
Using Almond Extract and Other Flavor Enhancers
A quarter teaspoon of almond extract works magic here. It whispers depth into the filling without shouting. As baker Clara Mendez notes: “It’s like adding moonlight to a sunset—subtle, but transformative.” Vanilla (½ teaspoon) can join for warmth, but let the fruit shine.
Reducing Juices to Achieve the Ideal Consistency
After mixing, let the cherry pie filling rest 10 minutes. Sugar draws out juices—don’t waste them! Simmer this liquid in a saucepan for 3-4 minutes until it thickens into a glossy syrup. Stir it back into the fruit. This step concentrates flavor and prevents a soggy crust.
Your patience rewards you: each slice will hold firm, revealing jam-like layers that cling to forks. Trust the process—and maybe sneak a spoonful of that reduced syrup. We won’t tell!
Building a Beautiful Lattice Top
Picture this: golden strips of dough woven like edible basketwork, cradling jewel-red filling beneath. A lattice isn’t just decoration—it’s edible art that lets steam escape while showcasing your vibrant cherry pie filling. And guess what? You’ll master it faster than preheating your oven.
Step-by-Step Lattice Construction
Start with chilled dough—cold strips hold their shape better. Roll out your top crust into a 12-inch circle, then slice it into ½-inch strips using a pizza cutter. Lay 6 strips vertically over the filling, spacing them evenly.
Fold back every other strip halfway. Place a horizontal strip across the unfolded ones. Unfold the vertical strips. Repeat, alternating folds until the grid forms. Trim excess dough, leaving a 1-inch overhang.
Press edges together with a fork or crimp with thumb-and-finger waves. Brush with egg wash (1 egg + 1 tbsp milk) for that golden glow. Pro tip: Work quickly to keep dough cool—it ensures crisp layers!
Alternative Top Crust Designs and Personalization
Not feeling the weave? Try these showstoppers:
| Design | Difficulty | Effect |
|---|---|---|
| Braided Edge | Intermediate | Rustic Elegance |
| Leaf Cutouts | Easy | Whimsical Charm |
| Star Vents | Beginner | Modern Simplicity |
Use cookie cutters for seasonal shapes, or etch initials with a knife. As baker Jamie Torres says: “Your crust tells a story—make it yours.” Even a classic double crust with steam vents becomes art when dusted with coarse sugar.
Remember: perfection’s overrated. Crooked strips? Call them “rustic.” Uneven crimps? “Handcrafted charm.” The real magic happens when that juice bubbles through the gaps, caramelizing into glossy ribbons. Now take a bow—you’ve just turned baking into poetry.
Baking and Finishing Touches
This is where your creation transforms from dough and fruit into edible sunshine. Let’s turn up the heat and watch magic happen!
Egg Wash, Coarse Sugar, and Temperature Tricks
Whisk one egg with a tablespoon of milk—this golden elixir gives your pie crust its signature glow. Brush it lightly over the lattice, then shower with coarse sugar. Those sparkly crystals? They’re crunch in disguise.
Preheat your oven to 400°F while assembling. Pastry chef Diego Martinez swears by this trick: “High heat sets the structure fast, locking in flakiness before juices bubble over.”
| Stage | Temperature | Effect |
|---|---|---|
| First 20 Minutes | 400°F | Crust sets, layers rise |
| Remaining Bake | 375°F | Even cooking, no burnt edges |
Timing the Bake for a Golden, Flaky Result
Set your timer for 50-60 minutes total. After the initial blast of heat, reduce to 375°F. Peek through the window—when edges bubble thickly like molten rubies, it’s done!
If the lattice darkens too quickly, tent loosely with foil. Remember: butter-rich dough browns faster than you’d think. Let it cool completely—this patience test rewards you with clean slices that hold their shape.
Make-Ahead, Storage, and Freezing Tips
Let’s face it—even the most passionate bakers need shortcuts that keep traditions alive without burning out. With a little planning, you can transform pie-making from a marathon into a joyful stroll. We’ve got your back with smart strategies to freeze dough, prep fillings, and store leftovers like a pro.
Prep Now, Bake Later
Your dough can chill in the fridge for up to 2 days or freeze for 3 months. Wrap disks tightly in plastic, then slide into a zip-top bag. Thaw overnight before rolling—no stress!
Mix filling ingredients 3 days ahead. Store them covered in the fridge, but wait to add cornstarch until assembly. This prevents the juice from thickening too soon. When ready, toss everything together and pour into your crust.
Keeping It Fresh
Baked pie stays crisp at room temperature for 2 days. For longer storage, refrigerate slices in airtight containers up to 5 days. Reheat at 350°F for 10 minutes to revive that flaky magic.
| Storage Method | Duration | Tips |
|---|---|---|
| Freezer (Unbaked) | 3 Months | Wrap in foil + plastic |
| Fridge (Assembled) | 2 Days | Cover with parchment |
Freeze whole baked pies? Absolutely! Cool completely, then wrap in two layers of foil. Thaw slowly in the fridge overnight before serving. The filling stays jammy, and the crust? Still worthy of grandma’s approval.
Conclusion
There’s nothing quite like slicing into a homemade creation that’s equal parts nostalgia and triumph. From selecting plump, fresh cherries to weaving that golden lattice, every step in this recipe invites you to slow down and savor the process. Your kitchen becomes a stage for connection—where flour-dusted counters and shared slices turn meals into memories.
Remember those make-ahead tricks? They’re your secret to baking without the clock watching. And that glossy egg wash? It’s the final wink before your masterpiece enters the oven. Whether you followed every detail or added your twist, the result whispers: “You did this.”
Now gather your people. Serve it warm with laughter swirling like steam from the crust. Snap a photo, swap stories, and tag us with your proudest cherry pie recipe moments. Because here’s the truth: perfection isn’t measured in flawless edges—it’s found in the joy of creating something real, messy, and utterly delicious. Ready for round two? Your next culinary adventure awaits.
FAQ
Can I use frozen cherries instead of fresh ones?
Absolutely! Frozen fruit works well—just thaw and drain excess liquid first. Toss them with a bit of flour or cornstarch to prevent a soggy crust. Sweet or tart varieties both shine here! 🥧
How do I keep the bottom crust from getting soggy?
Blind baking (pre-baking the crust) helps! Chill the dough thoroughly, line it with parchment, and use pie weights or dried beans. A sprinkle of sugar before adding filling also creates a crispy barrier.
What’s the secret to a flaky, tender crust?
Keep ingredients cold and handle the dough minimally. We swear by all-butter crusts for flavor, but adding a touch of vinegar or vodka to the dough can enhance tenderness. Don’t skip the chilling step! ❄️
Can I make the filling less sweet?
Yes! Adjust sugar to taste, and lean into tartness with extra lemon juice. A dash of almond extract adds depth without sweetness. Taste as you go—balance is key!
How do I prevent the lattice from burning?
Cover edges with foil during the first half of baking. For extra insurance, brush the lattice with an egg wash mixed with cream—it promotes even browning. Watch that oven temperature! 🌡️
Can I freeze an unbaked pie for later?
You bet! Assemble the pie, wrap it tightly in plastic, and freeze. When ready, bake straight from frozen—just add 15-20 minutes to the cook time. Perfect for impromptu gatherings!
Why add cornstarch to the filling?
It thickens the juices so your slice holds together beautifully. For a clearer set, try tapioca starch. Let the filling rest after mixing—it gives the thickener time to work its magic. ✨
How long should the pie cool before slicing?
Let it rest at least 2 hours—this allows the filling to firm up. We know it’s tempting, but patience rewards you with clean, Instagram-worthy slices! 📸
