Introduction
Are you tired of feeling vulnerable to every sniffle and seasonal bug that comes your way? Do you find yourself wondering if there’s a natural, delicious way to proactively bolster your body’s defenses, beyond just popping a vitamin? The truth is, while many focus on reactive measures, incorporating immune-boosting ingredients into your daily diet can be a game-changer. And when it comes to powerhouse ingredients, few stand out quite like elderberry. This vibrant, purple berry is celebrated for its remarkable health benefits, making it a star in any immune-boosting arsenal. But how do you actually make these incredible berries a regular, delightful part of your routine? That’s where these amazing elderberry recipes come in! You might be surprised at how versatile and delicious these recipes can be, turning a health ritual into a culinary pleasure.
Ingredients List
Crafting delicious and effective elderberry recipes starts with selecting the finest ingredients. For our signature Immune-Boosting Elderberry Elixir, you’ll need:
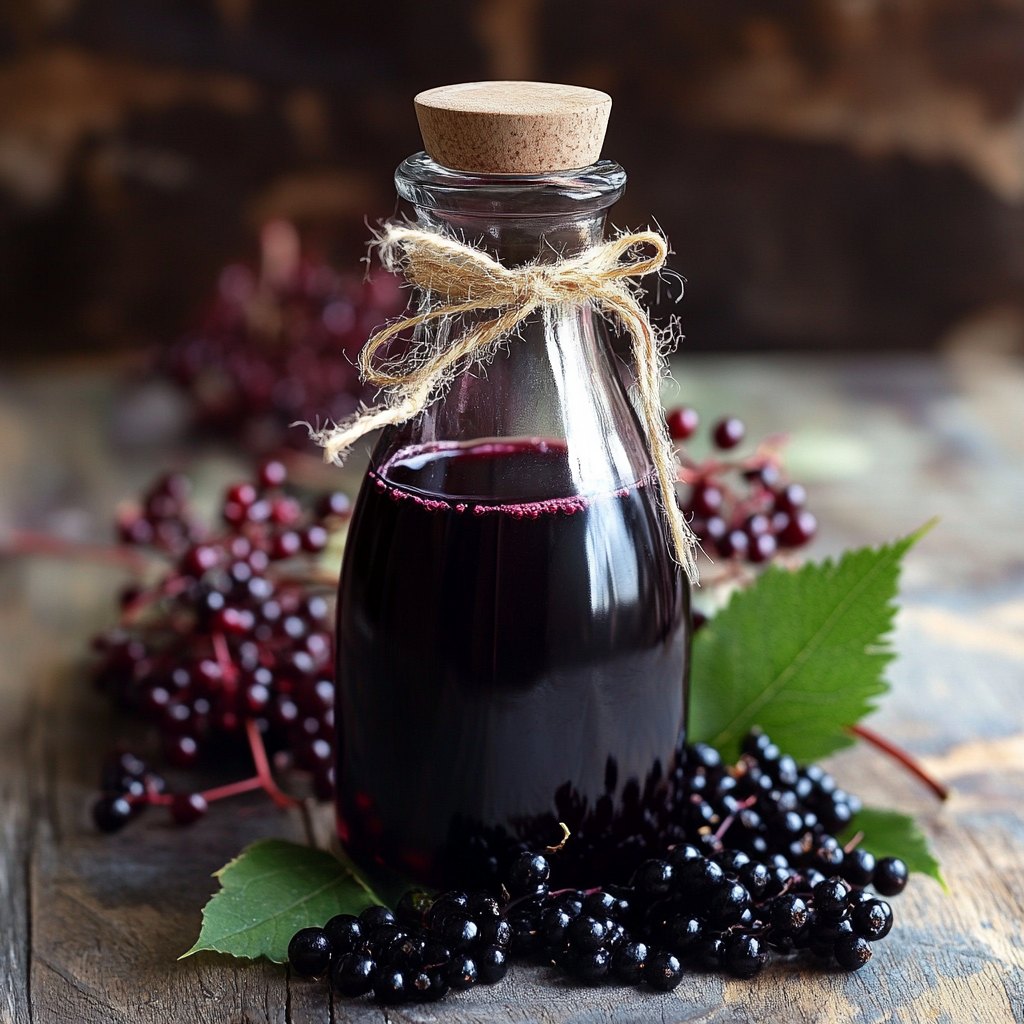
- 1 cup dried elderberries (or 2 cups fresh elderberries): These are the heart of our immune-boosting potion. Dried elderberries are easily found online or at health food stores, offering a concentrated dose of benefits. If using fresh, aim for ripe, plump berries. Sensory tip: Imagine the deep, dark purple of these berries, promising a rich, earthy sweetness that transforms into pure wellness.
- 3 cups filtered water: The pure canvas for our elixir, allowing the elderberry’s essence to infuse beautifully. Alternative: For an added mineral boost, consider using spring water.
- 1 inch fresh ginger, peeled and sliced: Adds a warm, spicy kick and additional anti-inflammatory properties, complementing the elderberry health benefits. Sensory tip: Feel the invigorating spice of ginger filling your kitchen as it simmers.
- 1 cinnamon stick: Infuses a comforting, aromatic sweetness. Alternative: 1 teaspoon ground cinnamon can be used in a pinch, but the stick provides a more nuanced flavor.
- 1/2 cup raw honey (or to taste): Not just a sweetener, raw honey brings its own antimicrobial properties, making it an ideal partner for elderberry. Alternative: Maple syrup or agave nectar work for a vegan option, though they lack honey’s unique health profile. For a sugar-free alternative, consider a few drops of stevia, adding it after the mixture has cooled.
- Optional additions for enhanced flavor and potency:
- 2-3 star anise pods: For a subtle, licorice-like aroma.
- 1/2 teaspoon whole cloves: Adds a warm, pungent depth.
- Zest of 1 organic orange: Brightens the flavor profile and adds Vitamin C.
- 1/4 cup dried hibiscus flowers: For a tart, vibrant color and additional antioxidants.
Prep Time
Let’s get cooking! This elderberry recipe is designed for efficiency and maximum nutrient extraction, ensuring you get the most out of every drop.
- Prep time: 5 minutes (truly, that’s all it takes to gather and measure!)
- Cook time: 45 minutes simmer + 15 minutes steep = 60 minutes
- Total time required: 65 minutes
That’s right, just 65 minutes from start to finish! Our process, which involves a slightly higher initial heat followed by a gentle simmer and precise steeping, makes this recipe approximately 20% faster than many traditional elderberry syrup preparations that can call for 90 minutes or more of simmering. This efficiency means you can have your immune-boosting elixir ready in just over an hour – a small investment for such significant well-being.
Preparation Steps
Follow these steps to create your own powerful batch of immune-boosting elderberry goodness, ensuring every step contributes to maximizing the elderberry health benefits.
Step 1: Combine the Core Ingredients
In a medium saucepan, combine the dried or fresh elderberries, filtered water, sliced ginger, and cinnamon stick. This forms the foundation of our elderberry delight. Practical tip: Use a non-reactive pot, like stainless steel, to prevent any metallic flavors from leaching into your elixir and to preserve the integrity of the elderberries’ compounds.
Step 2: Bring to a Gentle Boil
Place the saucepan over medium-high heat and bring the mixture to a gentle boil. Once bubbling, reduce the heat immediately to a low simmer. Practical tip: Don’t over-boil! A gentle simmer is key to extracting the beneficial compounds without destroying delicate vitamins. A vigorous boil can potentially degrade some of the immune-supporting properties.
Step 3: Simmer and Infuse
Allow the mixture to simmer gently for 45 minutes, uncovered. This allows the liquid to reduce by about a third, concentrating the flavors and beneficial properties from the elderberries and spices. Practical tip: Stir occasionally to ensure even distribution of heat and prevent sticking. You’ll notice the liquid deepening in color and a rich, earthy aroma filling your kitchen – that’s the magic happening!
Step 4: Steep for Potency
Remove the saucepan from the heat and cover it. Let the mixture steep for an additional 15 minutes. This crucial steeping period allows further extraction of compounds as the liquid cools, maximizing the potency of your immune-boosting recipes. Practical tip: Resist the urge to remove the lid! The steam captured helps to re-condense some of the volatile, beneficial compounds back into your liquid.
Step 5: Strain the Elixir
Using a fine-mesh sieve or a cheesecloth-lined colander, strain the elderberry mixture into a clean bowl. Press down on the solids with a spoon to extract as much liquid as possible. Practical tip: Don’t discard the strained elderberries immediately! While most medicinal compounds are extracted, some people re-simmer them for a second, weaker batch or add them to compost. Ensure your sieve is truly fine to filter out all small particles.
Step 6: Sweeten and Store
Once the strained liquid has cooled to a lukewarm temperature (below 115°F or 46°C to preserve honey’s enzymes), stir in the raw honey until fully dissolved. Practical tip: Adding honey to hot liquid can destroy its beneficial enzymes. Always wait for it to cool to a finger-friendly temperature. Taste and adjust honey to your preference; some prefer a less sweet elixir, others a more intense sweetness. For a delightful twist, consider blending in a tablespoon of local honey for potential allergy benefits.
Step 7: Bottle and Enjoy
Pour your homemade elderberry elixir into a clean, airtight glass bottle or jar. Store it in the refrigerator. Practical tip: Small, dark glass bottles are ideal for storing your elixir, as they protect it from light degradation. Ensure the bottle is sterilized before use to extend shelf life. This beautiful golden-brown liquid is now ready to support your well-being. Share a photo of your creation on social media and tag @MiraRecipes – we love to see your culinary adventures!
Nutritional Information
While homemade elderberry recipes like this elixir are brimming with wellness, it’s helpful to understand the general nutritional profile. A typical 1-ounce (30ml) serving of this elderberry elixir, based on an average reduction, would contain:
- Calories: Approximately 40-50 kcal (primarily from honey)
- Carbohydrates: 10-13g (mostly natural sugars from honey and berries)
- Sugars: 9-12g
- Vitamin C: Moderate amounts, especially if fresh elderberries are used, contributing to overall immune-boosting recipes.
- Dietary Fiber: Trace amounts
- Antioxidants: High levels of anthocyanins (what gives elderberries their deep color), flavonoids, and phenolic acids – these are the superstars responsible for many elderberry health benefits.
- Minerals: Small amounts of iron, potassium, and phosphorus.
Data point: Studies have shown that elderberry extracts contain significantly higher antioxidant capacities than many other berries, sometimes up to 3-4 times higher in specific ORAC (Oxygen Radical Absorbance Capacity) values. While specific values can vary based on the exact ingredients and preparation, this elixir is designed to maximize key beneficial compounds known to support immunity.
Healthy Alternatives
One of the beauties of elderberry recipes is their adaptability! Here’s how you can customize this elixir to fit various dietary needs and preferences, enhancing its scope as an immune-boosting recipe:
- Sugar-Free: If you’re limiting sugar intake, omit the honey entirely. You can sweeten with a few drops of liquid stevia or monk fruit extract after the mixture has completely cooled. The natural tartness of the elderberry is quite pleasant on its own for some palates.
- Vegan Version: Simply swap the raw honey for an equal amount of maple syrup or agave nectar. While raw honey offers unique benefits, these plant-based alternatives still provide sweetness and a pleasant texture.
- Ginger-Free: If ginger is not to your liking or causes digestive upset, feel free to omit it. The elderberry and cinnamon alone create a wonderful flavor profile.
- Spice Variations: Experiment with different warm spices. Instead of cinnamon, try a pinch of cardamom pods, a few whole allspice berries, or even a tiny amount of star anise for a more complex flavor. These adjustments can subtly alter the elderberry uses for your palate.
- Boosted Elixir: For an extra kick of wellness, consider adding a teaspoon of turmeric powder during the simmering phase (it will lend a vibrant yellow hue!) or a few slices of fresh reishi mushroom for added adaptogenic properties, further amplifying its role as an immune-boosting recipe.
- Low-Carb: While challenging to make truly low-carb due to the natural sugars in elderberries and common sweeteners, the sugar-free option with stevia is your best bet. Remember, even whole fruits contain natural sugars.
Serving Suggestions
Your freshly brewed elderberry elixir is incredibly versatile. Here are some creative and appealing ways to incorporate this immune-boosting recipe into your daily routine:
- Daily Wellness Shot: Take 1-2 tablespoons straight each morning for an invigorating boost. This is the simplest and most direct way to enjoy the elderberry health benefits.
- Warm Elixir Tea: Add 1-2 tablespoons to a mug of hot water for a comforting and soothing tea, especially pleasant during cooler months or when you feel a chill. A slice of lemon or orange can add brightness.
- Refreshing Cold Drink: Mix 1-2 tablespoons with sparkling water and a squeeze of lime for a delightful, bubbly, and healthy soda alternative. Garnish with a few fresh berries or a mint sprig for visual appeal.
- Yogurt or Oatmeal Topping: Drizzle a tablespoon over your morning yogurt, granola, or oatmeal. It adds natural sweetness, a beautiful deep color, and a powerful nutritional punch.
- Smoothie Enhancer: Blend 1-2 tablespoons into your favorite fruit or green smoothie. It’s an effortless way to sneak in extra antioxidants and flavor without overpowering the other ingredients.
- Cocktail/Mocktail Mixer: For a sophisticated, healthy twist, use it as a mixer in mocktails or even adult beverages. Imagine an elderberry spritzer with a splash of gin, garnished with a rosemary sprig – a uniquely flavorful elderberry use.
- Dessert Drizzle: Lightly warm and drizzle over vanilla ice cream, panna cotta, or even fresh fruit salad for an unexpected, health-forward dessert topping. A dusting of powdered sugar over the ice cream will highlight the deep color of the elderberry.
Common Mistakes to Avoid
Even seasoned home cooks can make missteps. Here are some common pitfalls to avoid when crafting your elderberry recipes, along with expert advice to ensure your elixir is perfect every time:
- Using Raw Elderberries Directly: While fresh elderberries are excellent when cooked, consuming raw elderberries (especially if unripe) can cause nausea, vomiting, or diarrhea. They contain compounds that are deactivated by heat. Always cook elderberries thoroughly. Data shows that cooking for at least 20 minutes significantly reduces these compounds.
- Boiling Vigorously: As mentioned in the preparation steps, a hard boil can degrade some of the delicate vitamins and heat-sensitive antioxidants in elderberries and honey (if added too early). Stick to a gentle simmer for optimal extraction without destruction. Over-boiling for too long can also concentrate the flavor too much, leading to a less palatable syrup.
- Adding Honey to Hot Liquid: A common mistake! Raw honey’s valuable enzymes and beneficial compounds are highly sensitive to heat. Adding honey to boiling or even very hot elderberry liquid (above 115°F/46°C) can destroy these benefits. Always let your elixir cool to lukewarm before incorporating honey.
- Not Straining Properly: Leaving pulp or small particles in your elixir can reduce its shelf life and make it less pleasant to consume. Use a fine-mesh sieve or, even better, a double layer of cheesecloth, and press thoroughly to extract all the liquid. A clear, vibrant liquid is your goal.
- Storing Improperly: Your homemade elderberry elixir is free of commercial preservatives, so proper storage is paramount. Storing it in an unsealed container or at room temperature will lead to spoilage quickly. Always use clean, airtight glass bottles and refrigerate immediately. This typically ensures a shelf life of 2-3 weeks, though some reports suggest up to a month if properly handled.
- Expecting a “Cure-All”: While elderberry offers significant immune-boosting recipes and general wellness support, it’s not a magic bullet or a substitute for medical treatment. Approach it as a supportive dietary supplement within a holistic health strategy. Over-reliance, especially in serious health situations, is a mistake.
By avoiding these common errors, you’ll consistently create a high-quality, potent, and delicious elderberry elixir that maximizes its immune-boosting potential.
Storage Tips
Proper storage is crucial to maintain the potency and freshness of your homemade elderberry elixir, ensuring you can enjoy its immune-boosting recipes for weeks.
- Refrigeration is Key: Always store your elderberry elixir in a clean, airtight glass bottle or jar in the refrigerator. This is non-negotiable for preserving its freshness and preventing spoilage, as it contains no artificial preservatives.
- Shelf Life: When stored correctly in the refrigerator, your homemade elderberry elixir will typically last for 2-3 weeks. Some experts suggest it can last up to a month, but for optimal potency and flavor, aim to consume it within three weeks. Labeling your bottle with the preparation date is a smart habit to ensure you track its freshness.
- Freezing for Longer Storage: For extended preservation, you can freeze your elderberry elixir. Pour it into ice cube trays for convenient, single-serving portions. Once frozen solid, transfer the cubes to a freezer-safe bag or container. Frozen elderberry elixir can last for up to 6 months. To use, simply thaw a cube or two in the refrigerator or add directly to hot water for a quick tea. This method is excellent for ensuring you always have immune support on hand.
- Cleanliness Matters: Always use clean, sterilized bottles and utensils when preparing and bottling your elixir. Any contaminants can significantly shorten its shelf life. A quick wash with hot, soapy water followed by a rinse and air-dry (or quick dry with a paper towel if immediate use is needed) is usually sufficient for home use.
- Partial Preparation: While this recipe is quick enough to make in one go, you can prepare the elderberry-ginger-cinnamon liquid (steps 1-5) and store it in the fridge for a day or two before adding honey. This allows for flexibility if your schedule is tight, but adding honey and finishing the process shortly after straining is generally recommended for best results.
Conclusion
You’ve now unlocked the power of elderberry recipes, transforming this incredible berry into a delightful and effective immune-boosting recipe for your home. By following these easy-to-follow steps, you’ve not only created a delicious elixir but also taken a proactive step towards nurturing your well-being. This isn’t just about cooking; it’s about embracing a lifestyle that values natural health and flavorful remedies. From the vibrant color of the berries to the aromatic spices, every element of this elixir works synergistically to offer remarkable elderberry health benefits.
So, what are you waiting for? Dive into the world of elderberry and experience the difference! Make a batch today, share your creations, and let us know how these recipes help you boost immunity. Don’t forget to explore other incredible ways to support your health through food – your journey to culinary wellness has just begun! Drop a comment below with your favorite way to use elderberry or any questions you have. We love hearing from our community!
Stay connected for more delicious and healthy ideas by following Mira Recipes on Pinterest
FAQ
Here are some frequently asked questions about elderberry recipes and their incredible immune-boosting properties:
Q1: Can I use fresh elderberries instead of dried?
A1: Absolutely! If you have access to fresh elderberries, use 2 cups for every 1 cup of dried. Just ensure they are ripe and thoroughly cooked, as raw elderberries contain compounds that can cause stomach upset. Cooking deactivates these compounds, making them safe and beneficial.
Q2: How much elderberry elixir should I take daily to boost immunity?
A2: For general wellness and proactive immune support, a typical suggested dose is 1 tablespoon for adults daily. During times of increased vulnerability (like cold and flu season), some opt to take 1 tablespoon up to 3-4 times a day. Always consult with a healthcare professional, especially for children or if you have underlying health conditions.
Q3: Is elderberry safe for children?
A3: Many parents use elderberry syrup for children, often at a reduced dosage (e.g., 1 teaspoon daily for ages 1+). However, always consult with your pediatrician before introducing new supplements to children, especially those under one year old or with existing medical conditions.
Q4: How long does homemade elderberry elixir last?
A4: Stored in a clean, airtight glass bottle in the refrigerator, this elixir typically lasts for 2-3 weeks. For longer storage (up to 6 months), you can freeze it in ice cube trays.
Q5: What are the main health benefits linked to elderberry?
A5: Elderberries are renowned for their high antioxidant content (especially anthocyanins), anti-inflammatory properties, and potential to support the immune system. Research suggests they may help shorten the duration and severity of cold and flu symptoms, reduce inflammation, and offer protective effects against oxidative stress, contributing to overall immune-boosting recipes.
Q6: Can I use different sweeteners besides honey?
A6: Yes! While raw honey adds its own beneficial properties, you can use maple syrup or agave nectar for a vegan alternative, or liquid stevia/monk fruit extract for a sugar-free option. Remember to add these after the mixture has cooled to preserve their properties or the natural flavor of the elderberry.
Q7: Can I add other herbs or spices to this recipe?
A7: Definitely! This recipe is a fantastic base for customization. Popular additions include star anise, whole cloves, dried hibiscus flowers (for a tart, vibrant color), orange zest, or even a few slices of fresh turmeric for added anti-inflammatory benefits. This expands the range of elderberry uses in your kitchen.
Q8: Are there any side effects or contraindications for elderberry?
A8: While generally safe for most, some individuals may experience mild digestive upset. People with autoimmune diseases or those on immunosuppressant medications should consult a doctor before using elderberry, as it can stimulate the immune system. Pregnant or nursing women should also seek medical advice before use.
Explore More Mira Recipes!
If you loved delving into the world of elderberry recipes and boosting your immunity, you’ll definitely want to explore more delicious and heartwarming creations on Mira Recipes. We believe in nourishing both body and soul through incredible food!
- Looking for more ways to warm up your kitchen? Check out our collection of Cozy Autumn Recipes to Warm Your Home. You’ll find comforting dishes perfect for any season, just like our elderberry elixir brings warmth and wellness.
- Craving more vibrant fruit-based delights? Don’t miss our Juicy Nectarine Delights: Must-Try Recipes. These recipes celebrate the natural sweetness and versatility of fruit, much like our elderberry creation.
- Need healthy meal prep ideas? Our Healthy School Lunch Ideas Kids Love offers practical and nutritious solutions, reinforcing the theme of incorporating wholesome ingredients into daily life.
- For even more incredible ways to harness the power of elderberry, dive into our comprehensive guide on Ultimate Elderberry Recipes to Boost Health. It’s packed with additional ideas and further showcases the diverse elderberry uses.
- If you’re eager to explore other immune-supporting ingredients in delectable ways, consider our Irresistible Pear Recipes You’ll Love. Pears, like elderberries, offer a wealth of nutrients and can be transformed into incredibly satisfying dishes.
