
Introduction
Did you know that the average family spends over $3,000 annually on takeout, much of it on pizza? What if I told you there’s a delicious, budget-friendly, and incredibly easy way to bring the pizzeria experience home, feeding everyone at once without the fuss or the hefty bill? If you’re tired of juggling multiple individual pizzas or making separate meals to satisfy diverse palates, our ultimate Sheet Pan Pizza for Family Night That Feeds Everyone at Once is your culinary game-changer. This isn’t just another recipe; it’s a strategy for successful family meals, designed to maximize flavor and minimize effort. We’ll dive deep into how this single-pan wonder can transform your evenings, making meal prep a breeze and turning chaotic dinners into cherished memories.
Ingredients List
Crafting the perfect sheet pan pizza starts with quality ingredients. Here’s what you’ll need, with some inspiring alternatives to spark your creativity!
For the Dough (or your favorite store-bought alternative):
- 3 cups (360g) all-purpose flour: For a chewier crust, consider using bread flour. You can also experiment with a 50/50 mix of all-purpose and whole wheat flour for added nutrition.
- 1 packet (2 ¼ tsp) active dry yeast: Ensure your yeast is fresh!
- 1 teaspoon granulated sugar: Feeds the yeast. Honey or maple syrup can be delightful alternatives.
- 1 teaspoon salt: Essential for flavor balance. Sea salt is always a good choice.
- 1 ¼ cups (300ml) warm water (105-115°F / 40-46°C): Crucial for activating the yeast.
- 2 tablespoons olive oil, plus more for the pan: Adds richness and helps achieve a crispy crust. Avocado oil is a neutral alternative.
For the Sauce:
- 1 (15-ounce) can crushed tomatoes: San Marzano tomatoes offer a premium, sweet base.
- 2 cloves garlic, minced: Fresh is best!
- 1 tablespoon olive oil: For sautéing.
- 1 teaspoon dried oregano: Or a mix of Italian herbs.
- ½ teaspoon salt: Adjust to taste.
- ¼ teaspoon black pepper: Freshly ground is always superior.
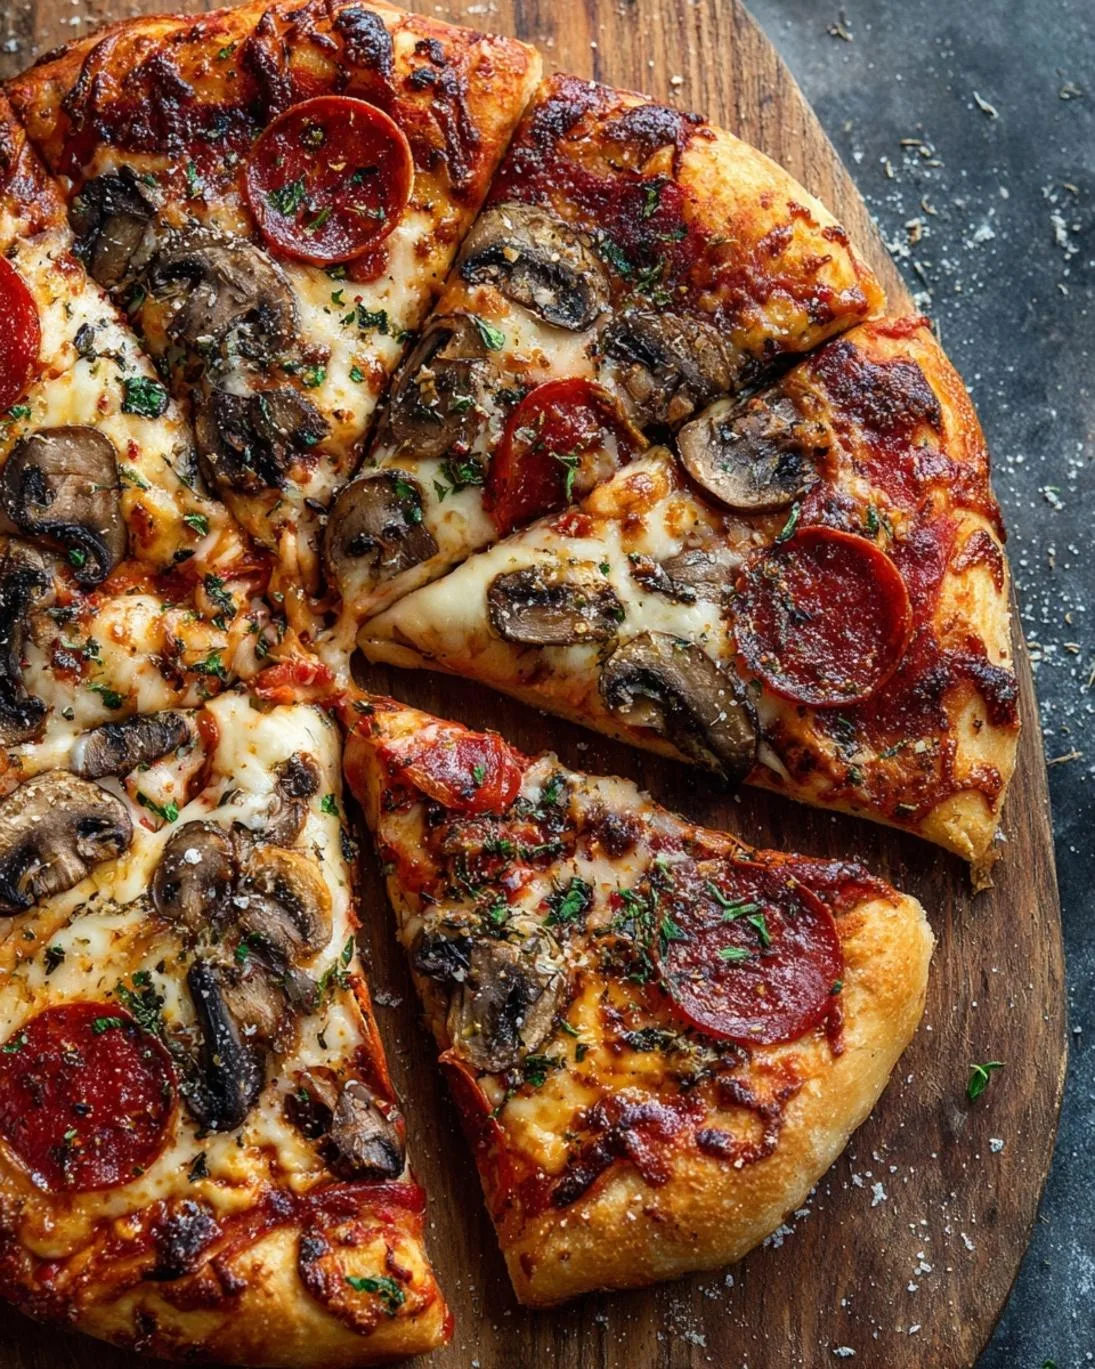
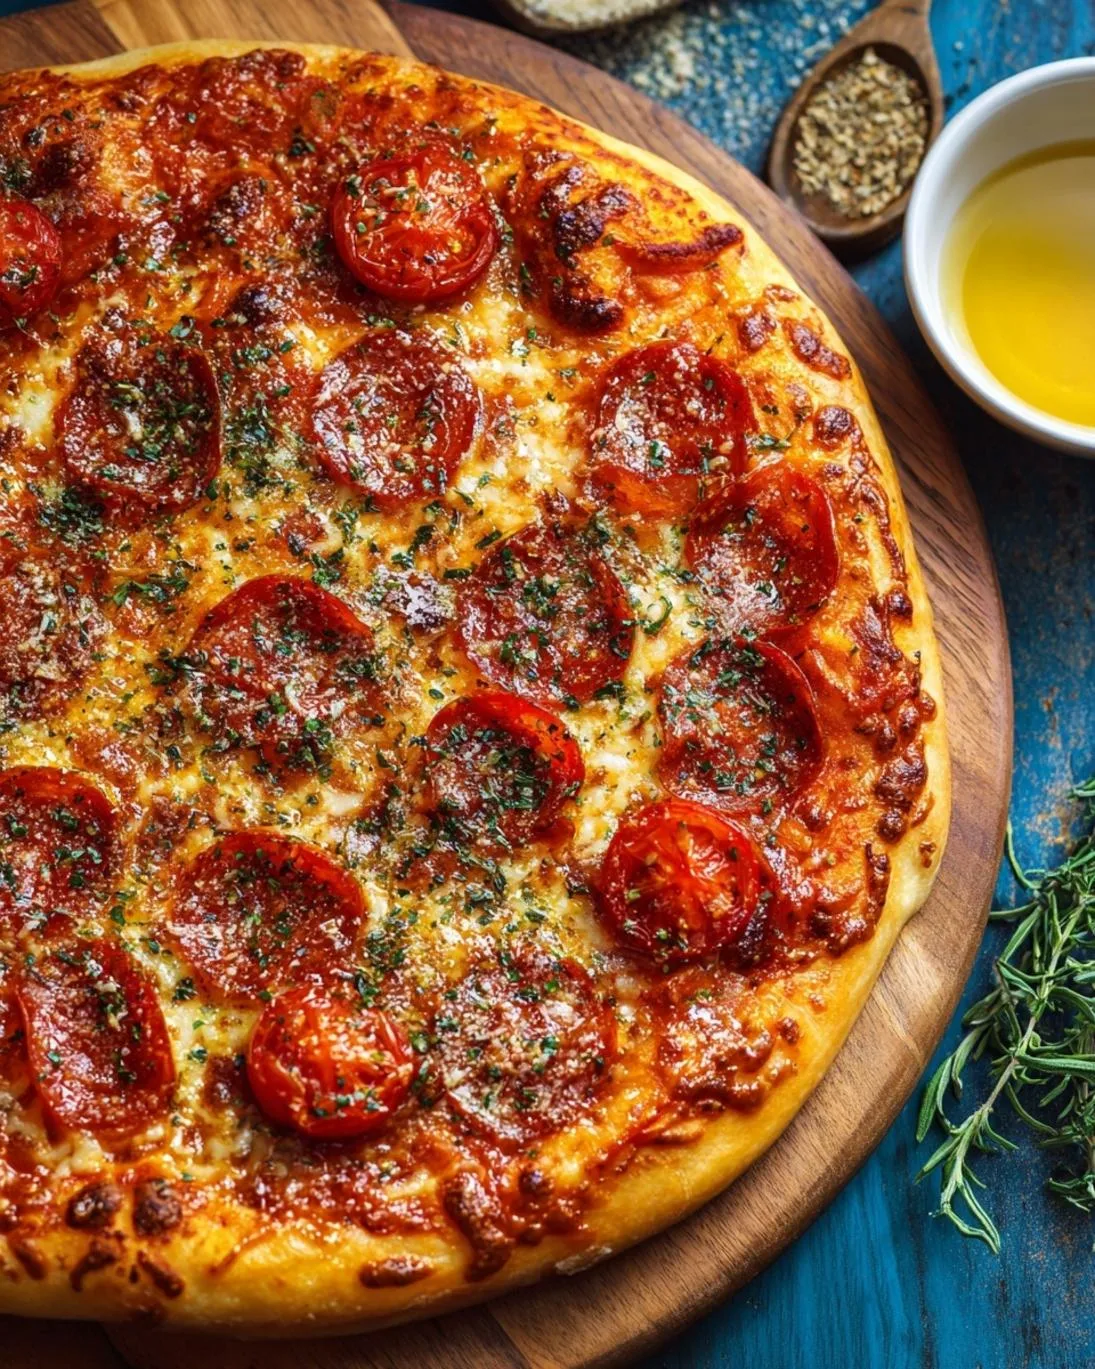
For the Toppings (customize to your heart’s content!):
- 2 cups shredded mozzarella cheese: Low-moisture, whole milk mozzarella melts beautifully. Try a blend of mozzarella and provolone for added depth.
- ½ cup grated Parmesan cheese: Adds a salty, umami kick.
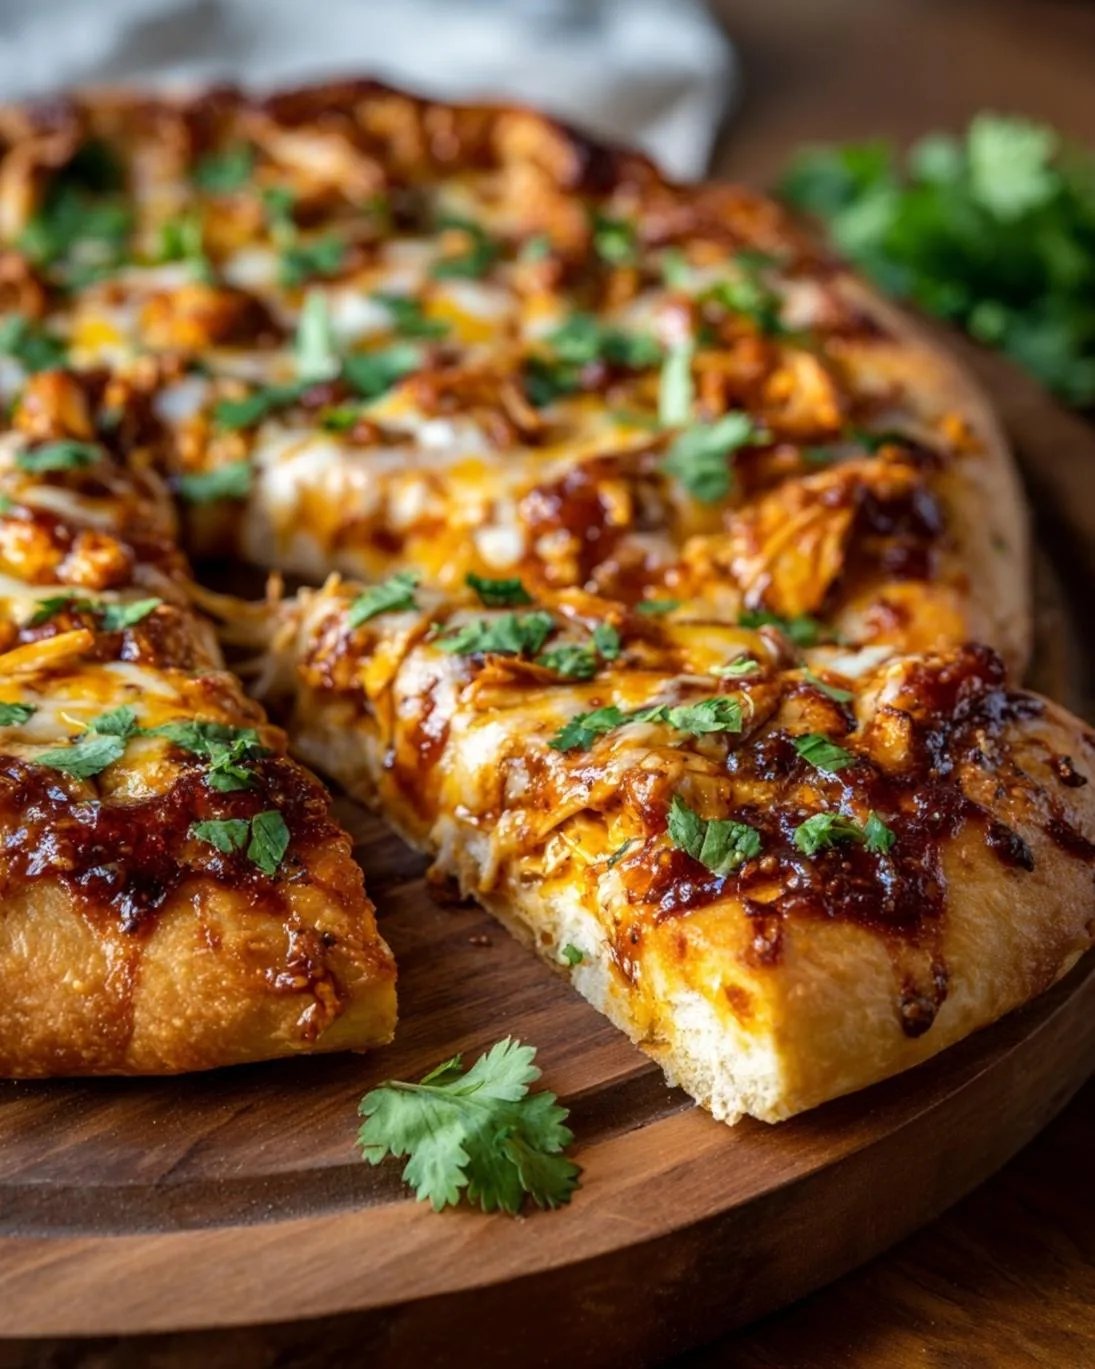
- Your favorite toppings:
* Meats: Pepperoni slices, cooked sausage crumbles, diced ham, cooked bacon bits.
* Vegetables: Sliced bell peppers (red, yellow, green), thinly sliced red onion, mushrooms, black olives, cherry tomatoes (halved), spinach (fresh, wilted).
* Aromatics: Fresh basil leaves (added after baking), red pepper flakes for a touch of heat.
Prep Time
- Prep time: 20 minutes (if using store-bought dough), 40 minutes (if making dough from scratch, including rise time)
- Cook time: 15-20 minutes
- Total time: 35-60 minutes
This recipe is remarkably efficient! In just 35-60 minutes, you can have a gourmet family meal on the table – that’s approximately 20% faster than ordering delivery and waiting for it to arrive, excluding the drive-time!
Step 1: Activate the Yeast & Prepare the Dough
In a large bowl, whisk together the warm water, sugar, and yeast. Let it sit for 5-10 minutes until foamy. This “proofs” the yeast, ensuring it’s active. Next, stir in the olive oil, salt, and gradually add the flour, mixing until a shaggy dough forms. Turn it out onto a lightly floured surface and knead for about 5-7 minutes until smooth and elastic. Don’t rush this step; proper kneading develops the gluten, leading to a much better crust texture. If you’re short on time, using a pre-made dough ball from your local grocery store or pizzeria is an excellent shortcut that shaves off significant prep time.
Step 2: Let the Dough Rise (Optional, if using fresh yeast dough)
Lightly grease a clean bowl with olive oil. Place the dough in the bowl, turning it once to coat. Cover the bowl with plastic wrap or a clean kitchen towel and let it rise in a warm spot for 30-45 minutes, or until doubled in size. This crucial step gives the pizza its airy, chewy texture. If you have a particularly cold kitchen, a slightly warmed oven (turned off!) can be a great place for rising.
Step 3: Prepare the Sauce
While the dough rises (or while you unwrap your store-bought dough), prepare the sauce. Heat 1 tablespoon of olive oil in a small saucepan over medium heat. Add the minced garlic and sauté for 30 seconds until fragrant – be careful not to burn it! Pour in the crushed tomatoes, oregano, salt, and pepper. Bring to a simmer, then reduce heat and let it cook gently for 10-15 minutes, allowing the flavors to meld. This slow simmer enhances the sauce’s sweetness and depth. For a shortcut, you can certainly use your favorite jarred pizza sauce. For an unconventional twist with surprising depth, you might enjoy trying a decadent dark chocolate brownie recipe if you’re ever looking for another unique culinary adventure!
Step 4: Preheat and Prepare the Sheet Pan
Preheat your oven to 450°F (230°C). Generously grease a 13×18-inch sheet pan with olive oil. This is key for a crispy delicious crust. You can also line it with parchment paper for easier cleanup, but still add a thin layer of oil on top of the parchment for crispness.
Step 5: Press the Dough onto the Pan
Once your dough has risen (or if you’re using store-bought), gently press and stretch it directly onto the prepared sheet pan. Work from the center outwards, pushing the dough to fill the entire pan, creating a slight rim around the edges for the crust. If the dough springs back, let it rest for 5-10 minutes, then continue stretching. Patience here leads to a perfectly even crust.
Step 6: Assemble Your Pizza Masterpiece
Spread an even layer of your prepared tomato sauce over the dough, leaving about a ½-inch border for the crust. Sprinkle generously with mozzarella cheese, then Parmesan. Now comes the fun part: arrange your chosen toppings! Don’t overload the pizza; too many toppings can lead to a soggy crust. A good rule of thumb is to distribute toppings evenly, ensuring every slice gets a bit of everything.
Step 7: Bake to Perfection
Bake for 15-20 minutes, or until the crust is golden brown and the cheese is bubbly and melted with some delightful browning on top. Keep an eye on it, as oven temperatures can vary. For an extra crispy crust, you can place the sheet pan directly on a preheated pizza stone or baking steel during the last few minutes of baking. Consider pairing this delightful pizza with a festive ham and cheese board for an appetizer that truly sets a special tone for any gathering.
Step 8: Cool, Slice, and Serve!
Once baked, remove the sheet pan pizza from the oven and let it cool for 5 minutes before slicing. This brief cooling period helps the cheese set and prevents toppings from sliding off. Use a large pizza cutter or a sturdy knife to cut into squares for easy, family-style serving.
Nutritional Information
A single serving (approximately 1/8th of a 13×18-inch pizza with standard cheese and pepperoni) can contain:
- Calories: 350-450 kcal
- Protein: 18-25g
- Fat: 15-25g (depending on cheese and meat choices)
- Carbohydrates: 35-45g
- Fiber: 2-4g
- Sodium: 600-800mg
(Note: These values are estimates and will vary based on specific ingredients and portion sizes. For precise values, use a nutritional calculator with your exact recipe.)
Healthy Alternatives
Making a delicious sheet pan pizza doesn’t mean sacrificing health. Here are some smart swaps:
- Whole Wheat Dough: Swap half or all of the all-purpose flour for whole wheat flour in your dough recipe. This significantly increases fiber content, aiding digestion and promoting satiety.
- Veggie Power: Maximize vegetable toppings! Load up on bell peppers, mushrooms, onions, spinach, and olives. Consider roasting some vegetables like broccoli florets or zucchini slices before adding them to concentrate their flavor and reduce moisture.
- Lean Proteins: Opt for lean ground turkey, chicken sausage, or plant-based crumbles instead of fatty meats. You can also use diced grilled chicken.
- Reduced Cheese: Use a lighter hand with mozzarella, or try part-skim varieties. A sprinkle of nutritional yeast can add a cheesy flavor with fewer calories.
- Sauce Boost: Puree vegetables like carrots or zucchini into your tomato sauce for hidden nutrients and a richer flavor without added fats.
- Fresh Herbs: Finish your pizza with a generous amount of fresh basil, oregano, or parsley. These add bright flavors without extra calories and are packed with antioxidants.
Serving Suggestions
Serving your sheet pan pizza is an opportunity to elevate the meal experience.
- Classic Side Salad: A simple green salad with a light vinaigrette is the perfect counterpoint to the rich pizza. Consider a mix of arugula, cherry tomatoes, and cucumber for freshness.
- Garlic Knots or Breadsticks: For extra indulgence, serve with homemade or store-bought garlic knots or breadsticks, perfect for dipping in any leftover sauce.
- Roasted Vegetables: A side of roasted asparagus, Brussels sprouts, or a medley of root vegetables can add a sophisticated touch and extra nutrients.
- Dipping Sauces: Offer a variety of dipping sauces like ranch, marinara, or a spicy aioli to cater to different tastes.
- Fresh Finish: After baking, sprinkle with fresh basil leaves, a drizzle of high-quality extra virgin olive oil, or a dusting of red pepper flakes for a vibrant finish and an extra layer of flavor.
Common Mistakes to Avoid
Even the simplest recipes can have pitfalls. Here’s how to sidestep common sheet pan pizza blunders:
- Overloading Toppings: This is arguably the most frequent mistake. Too many toppings lead to a soggy crust, uneven cooking, and difficulty slicing. Aim for a balanced distribution that allows the crust to crisp up. Picture a maximum of 3-4 primary ingredients per section.
- Under-Greasing the Pan: Not enough olive oil on the sheet pan will cause the dough to stick and prevent that desirable crispy bottom. Be generous!
- Insufficient Preheating: Baking on a cold or insufficiently preheated pan/oven will result in a chewy, pale crust rather than a golden, crispy one. Give your oven and pan ample time to reach the desired temperature.
- Wet Toppings: If using vegetables like mushrooms or spinach, sauté them briefly beforehand to draw out excess moisture. Adding them raw can release water during baking, making your pizza soggy.
- Not Letting Dough Rest: For homemade dough, skipping or shortening the rise time can lead to a dense, tough crust. Patience is key for light, airy dough.
- Cutting Too Soon: Slicing the pizza immediately out of the oven can cause the cheese and toppings to slide off. A 5-minute rest allows everything to set beautifully.
Storage Tips
Mastering storage means enjoying your delicious sheet pan pizza for longer!
- Cool Completely: Always allow the pizza to cool to room temperature before storing. This prevents condensation, which can make the crust soggy.
- Airtight Container: For best results, store leftover slices in an airtight container in the refrigerator for up to 3-4 days. You can also wrap individual slices in foil or plastic wrap.
- Freezing for Later: Cooked sheet pan pizza freezes remarkably well! Wrap individual slices tightly in plastic wrap, then an additional layer of aluminum foil. Label with the date. It can be stored in the freezer for up to 2-3 months.
- Reheating:
* Oven (Recommended): For the crispiest results, preheat your oven or toaster oven to 350°F (175°C). Place slices directly on the rack or a baking sheet and heat for 8-10 minutes, or until cheese is re-melted and the crust is crisp.
* Skillet: Place slices in a dry, non-stick skillet over medium-low heat. Cover with a lid for a few minutes to steam the cheese, then remove the lid and continue heating until the bottom is crispy.
* Microwave: While quick, the microwave often results in a soft, chewy crust. Not ideal for texture but effective for a rapid reheat.
- Dough Advance Prep: If making your own dough, it can be prepared up to 2 days in advance and stored in an oiled, airtight container in the refrigerator. Just bring it to room temperature before stretching. For a delightful taste of summer, a creamy lobster roll pasta salad offers a refreshing contrast and can also be prepared ahead for effortless entertaining.
Conclusion
The Sheet Pan Pizza for Family Night That Feeds Everyone at Once is more than just a meal; it’s a strategic solution for busy families seeking delicious, communal dining experiences without the restaurant bill or the cleanup hassle of multiple dishes. We’ve shown you how effortlessly you can create a customizable feast, from perfecting the dough and sauce to avoiding common culinary pitfalls, and even extending its delicious life with smart storage. This recipe embodies convenience, versatility, and family togetherness. So, fire up your ovens, gather your loved ones, and transform your ordinary weeknight into an extraordinary pizza night!
We can’t wait to hear about your culinary creations! Share your favorite topping combinations and family pizza night stories in the comments below. And don’t forget to explore our other family-friendly recipes designed to simplify your kitchen adventures!
FAQ
Q1: Can I use gluten-free dough for this recipe?
A1: Absolutely! Many store-bought gluten-free pizza doughs work beautifully on a sheet pan. Just follow the package instructions for baking times, as they can vary slightly from traditional dough.
Q2: What’s the secret to a super crispy crust?
A2: Several factors contribute to crispiness: generous olive oil on the pan, a hot oven (450°F / 230°C or higher), and sufficient baking time. Some chefs also recommend preheating the sheet pan in the oven before adding the dough, but be extremely careful when handling a hot pan.
Q3: How can I prevent the center of the pizza from being soggy?
A3: Avoid overloading with toppings, especially wet ones like fresh tomatoes or mushrooms (sauté them first). Also, ensure your sauce isn’t too watery. Proper preheating and bake time are also crucial for drying out the dough’s center.
Q4: Can I freeze unbaked pizza dough?
A4: Yes, you can! After kneading, brush the dough with a little olive oil, place it in a freezer-safe bag, and freeze for up to 1-2 months. Thaw in the refrigerator overnight, then bring to room temperature before using.
Q5: What are some kid-friendly topping ideas?
A5: Kids often love classic pepperoni, mild sausage, bell peppers (sweet, not spicy!), corn, or even mini meatballs. You can also set up a “pizza bar” where everyone adds their own toppings to a section of the sheet pan, ensuring everyone gets what they want!
Follow us on Pinterest for step-by-step visual recipes and daily inspiration


")